paxe
-
Posts
783 -
Joined
-
Last visited
-
Days Won
141
Content Type
Forum
Store
Profiles
Cheats
Everything posted by paxe
-
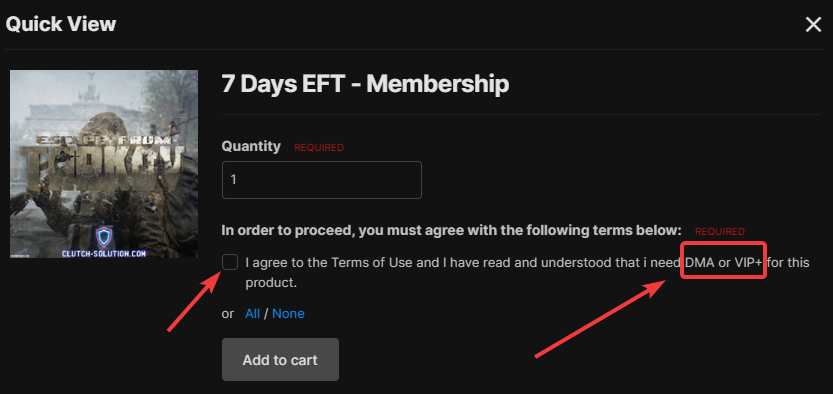
Hello It does tell you upon adding the product to your cart. See screenshot below. Since you already have a ticket open in the discord we will continue there. /closed and continued in ticket

-
 Resolved in a ticket on discord. /closed
 -
Hey For EFT there's two option how you can run it. DMA: You need to buy the EFT subscription and own a compatible DMA Hardware. VIP+ You need to buy the EFT subscription AND the VIP+ subsciption. The VIP+ membership in this case would be the "premium membership" you are talking about. VIP+ basically gives you access to a program that does the stuff the DMA card would usually do. It needs another dev and thus the extra cost that comes with it. Let us know if you have any other questions. For faster response times we recommend joining us on our discord https://discord.gg/Y8VgGpgDBt
-
Hello Lagswitch works as always. Our LagSwitch has never been detected. The way it is coded makes it very very hard to ever get detected, at most it would get patched. And even that is is very unlikely, and we don't see that happening anytime in the near future.
-
Hello 1. We recommend using RDP, but Teamviewer should work just fine. 2. Kaspersky will most likely cause isses, many antivirus cannot be fully disabled (even if it looks like it) and will still interfere with the system. You might get away with just disabling it when running our software and enabling it again after, but please keep in mind we cannot promise/guarantee anything in regards to this. 2-1. Already answered in 2. - Further: We did not test this as we don't recommmend/support this, if there are any issues during setup we won't really be able to provide help as long as we don't know that kaspersky isn't causing any problems. 3. HWID bans are really random, sometimes you receive HWID bans and sometimes you don't. The only way of knowing for sure is by risking a new acoount. However, our VIP+ Solution has been safe for about 6 months and DMA for about a year.
-
Hey https://discord.gg/Y8VgGpgDBt
-
payment not working [solved]
paxe replied to alphastoner's topic in Pre-Sale Questions and Payment Information
Hello That's something @Uwe or @Kenion will have to look at in more detail. Sorry for the inconvenience and thank you for your patience. -
https://discord.gg/Y8VgGpgDBt Let me know if it works
-
Use this one for now. Thank you
-
any error messages?
-
Hello If you are talking about multiple perspectives at the same time then that's gonna be a no. That would be pretty much the same as giving you multiple subscriptions for the price of one. Technically that would probably be possible but I am pretty sure that's not something we are going to implement. If you are just talking about switching perspective then you can already do so by hitting tab and selecting the player you want to have the perspective of. I hope that answered your question.
-
Hello Here are the commands: Auto Update: sc config wuauserv start= auto net start wuauserv Firewall: netsh advfirewall set allprofiles state on Fast Startup: REG ADD "HKLM\SYSTEM\CurrentControlSet\Control\Session Manager\Power" /V HiberbootEnabled /T REG_dWORD /D 1 /F
-
75T DMA board questions
paxe replied to bishopp's topic in Pre-Sale Questions and Payment Information
I can confirm this. Also, Q4 is still planned. However with the chip shortage still going strong we can not really promise that we will 100% still get them in 2021. Unfortunately it is very unpredictable at the moment. -
All good If you need anything else don't hesitate to open a ticket in the discrod for fastest support or simply reply here.
-
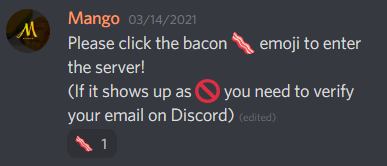
You need to click the bacon After that you can see the presale-general channel and check the pins
-
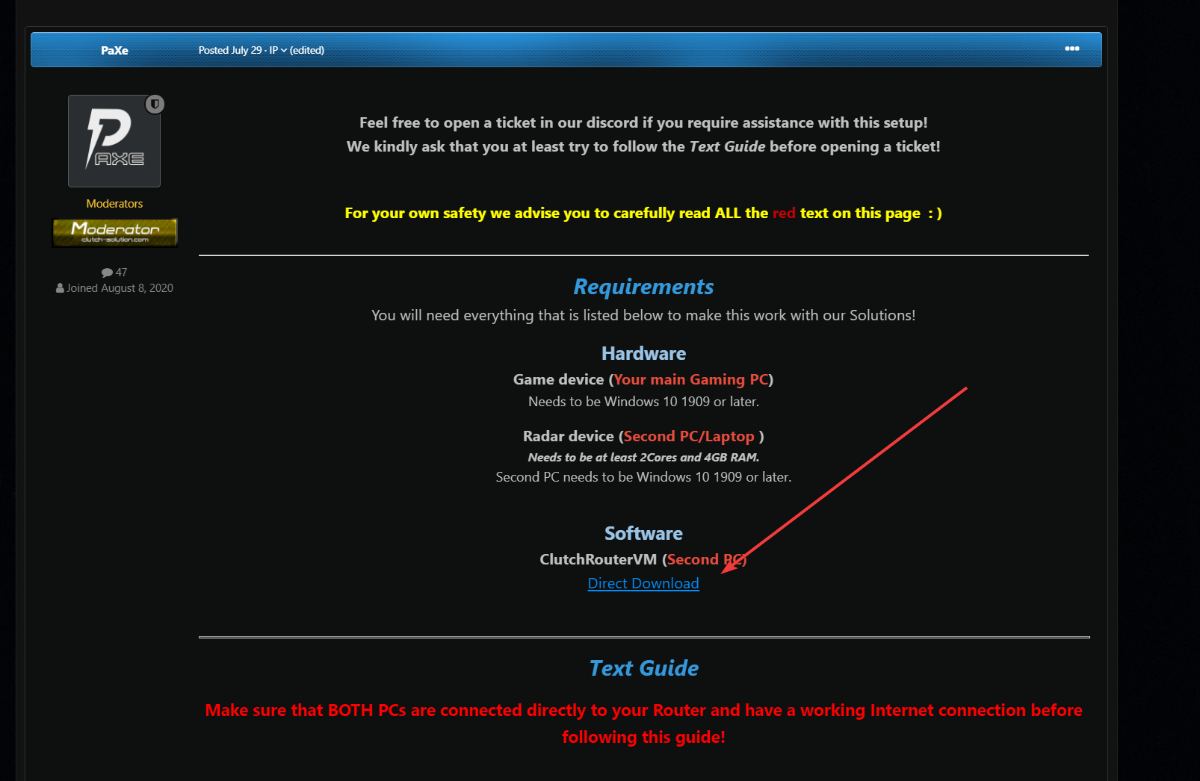
Hello You should always pick a vps that is close to you so that a good ping is ensured -- it needs to be a windows VPS with at least 2 cores and 4gb ram. You can find a recommended list in the pinned messages of the presale channel in our discord, The Radar and ESP will both be displayed in a separate window and NOT in-game. 21H1 should work just fine.
-
EFT RADAR QUESTIONS
paxe replied to Buttholesurfer's topic in Pre-Sale Questions and Payment Information
Hello For obvious reasons we can't really talk about how our solutions work in public but we have our ways to get to the data we need :). We recommend a 2 PC setup for best performance but both work fine. You won't need a fresh install of windows, but both PCs need to be Windows 10 1909 or newer - You can check that by running the winver command. Once you purchase your subscriptions you will get access to detailed step by step guides that guide you through the setup and we also have a nice support team on discord that is almost 24/7 available to help you out in case you get stuck somewhere. -
Hello stg, You can find the RouterVM as a direct download at the top of the Guide Page. Unzip the file you get with that download and then open it from the VMWare Player.
-
Already unbanned by @Kenion. @Mangowill investigate why it happened in the first place. Sorry for the inconvenience!
-
@UwePlease check this out
-
Hello. It is blocked and will not work.
-
+1
-
But why are you guys posting this here and not in testimonials ?
-
+1