What's New?
- Today
-
-

trying to purchase sub
paxe replied to bubbaj70's topic in Pre-Sale Questions and Payment Information
Hello, You can edit your address here https://clutch-solution.com/clients/addresses/ -
hello im trying to purchase sub- but when i look my home addy is listed wrong where do i go to correct this?
-
 Try again should work, there was a update
 -
 I am trying to redeem a 1 day pass for cheats i got from Ducks Services and it wont load the page where i am supposed to redeem.
 - Yesterday
-
-
Not yet, we will make announcement as soon as its ready
-
any news on tarkov esp?
- Last week
-
Moved to discord ticket
-
I have a general question. I'm new to this and I'm wondering if there's a guide that explains what each section of the configuration does and how to activate only the features I want, without any unnecessary components. I know it might sound like a silly question, but I have to ask. Is there a place where the configuration files are shared?
-
Hello, I see that you are on our discord. Can you open a ticket there so that we can look into it
-
Squad injects but nothing works
-
Thank you for the feedback, I will forward ur message to the dev
- 1 reply
-
- 1
-

-
Really fond of the ESP, streamproof is a good sell. Works relatively simple out of the box. With memory write features like FOV and Skillchecks, I think auto actions could be added, such as: -Automatically drop pallet when killer is in stun radius -Automatically drop pallet during pickup animation for pallet save -Auto dead hard when the killer swings etc. For both the external and the DMA solution, these are subtle, closet features that can be masked with KM Box as legitimate inputs as well, similar to auto skillchecks.
-
-
not at the current time, if we will have anything we will let u know
- Earlier
-
is in the plans?
-
Should be fixed try again
-
Moved to discord ticket
-
Issue should be fixed try again
-
Last photo is upside down cuz I hang from a banana tree
-
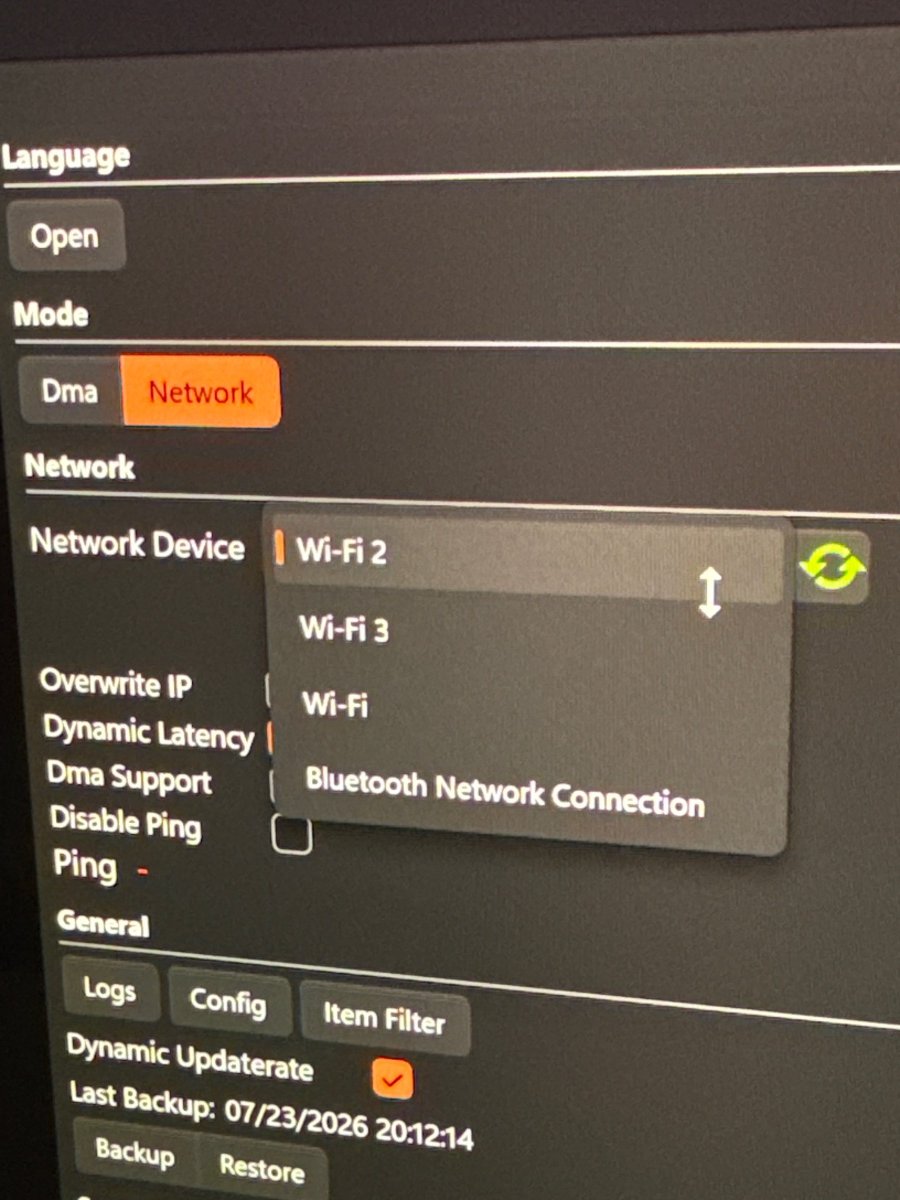
Title. have tried all three options and created inbound rules. I pinged both computers and they did respond. So they are both on the same network override ip did not work either

-
im having the same issues. waiting for ticket on DC to be read and respond to
-
Yes I have the same issue.
-
Started loader and after I signed in it started building custom loader. Then it bounces me between in position queue 1 or 2 then back to building custom loader then back in a queue. Been stuck here for 45 mins. Is this normal?